 Before you jump in and starting designing your own trading cards, there are a few concepts to understand. These are explained below.
Artwork
* Artwork to be 69mm x 94mm at 200 dpi or greater.
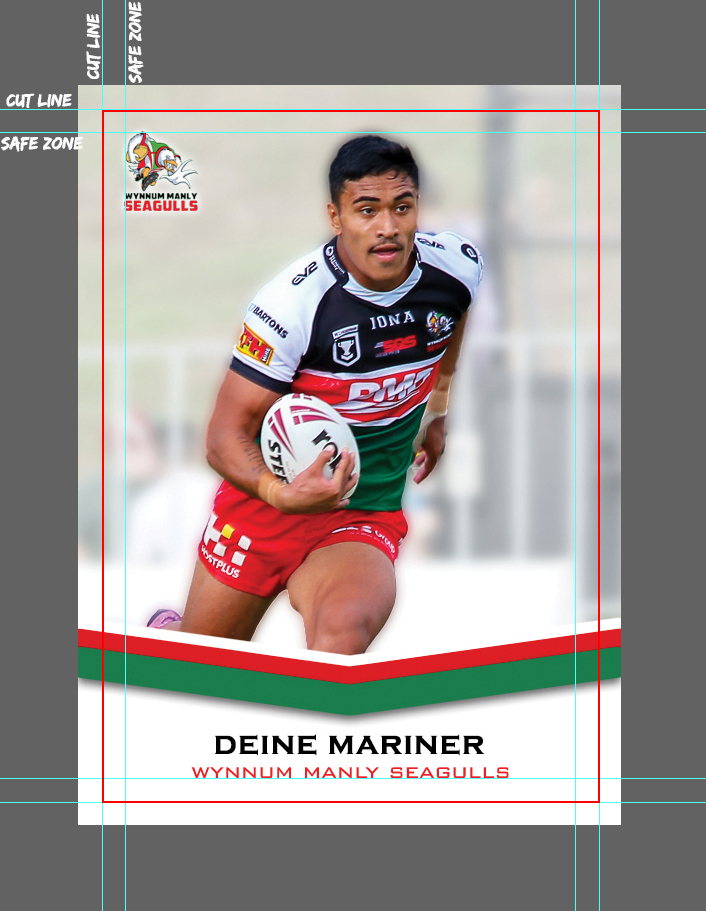
* Sample image shows the two sets of cyan lines. Click on it for a larger view. The outer lines are set at 3mm in from the edges of the artwork. The red rectangle is where we cut. We don't cut on the edge of the artwork, we cut inside it. This is common practice with any printed product.
* The inner line is 6mm in from the edge of the artwork. All logos, text and players heads should be inside these lines. When the cards are cut, this leaves a 3mm margin/safe zone from the key information to the edges of the card. Check any AFL or NRL card and you will see what we mean. :)
Recommendations
* For best results, fill your image or artwork to the edge of the design.
* Each card to be printed, is to be supplied as a seperate file. 1 card = 1 PDF file. The format is a 2 page PDF with the card front on page one and card back on page two. Download the Sample File or watch a video on how to do this (Photoshop or Canva)
* No need for crop marks, it is automated at our end.
* Zip up all of your pdf files into a single Zip file and send us the link to the file. Use Google Drive, One Note, Dropbox or We Transfer.
* Not sure if you have done it right? Send us one card's artwork (link below) before completing the rest. Occasionally, we receive multiple files, all with the same issue that need correcting before printing.
How to design a basic trading card in canva - full walkthrough from start to finish. (Free version of Canva)